
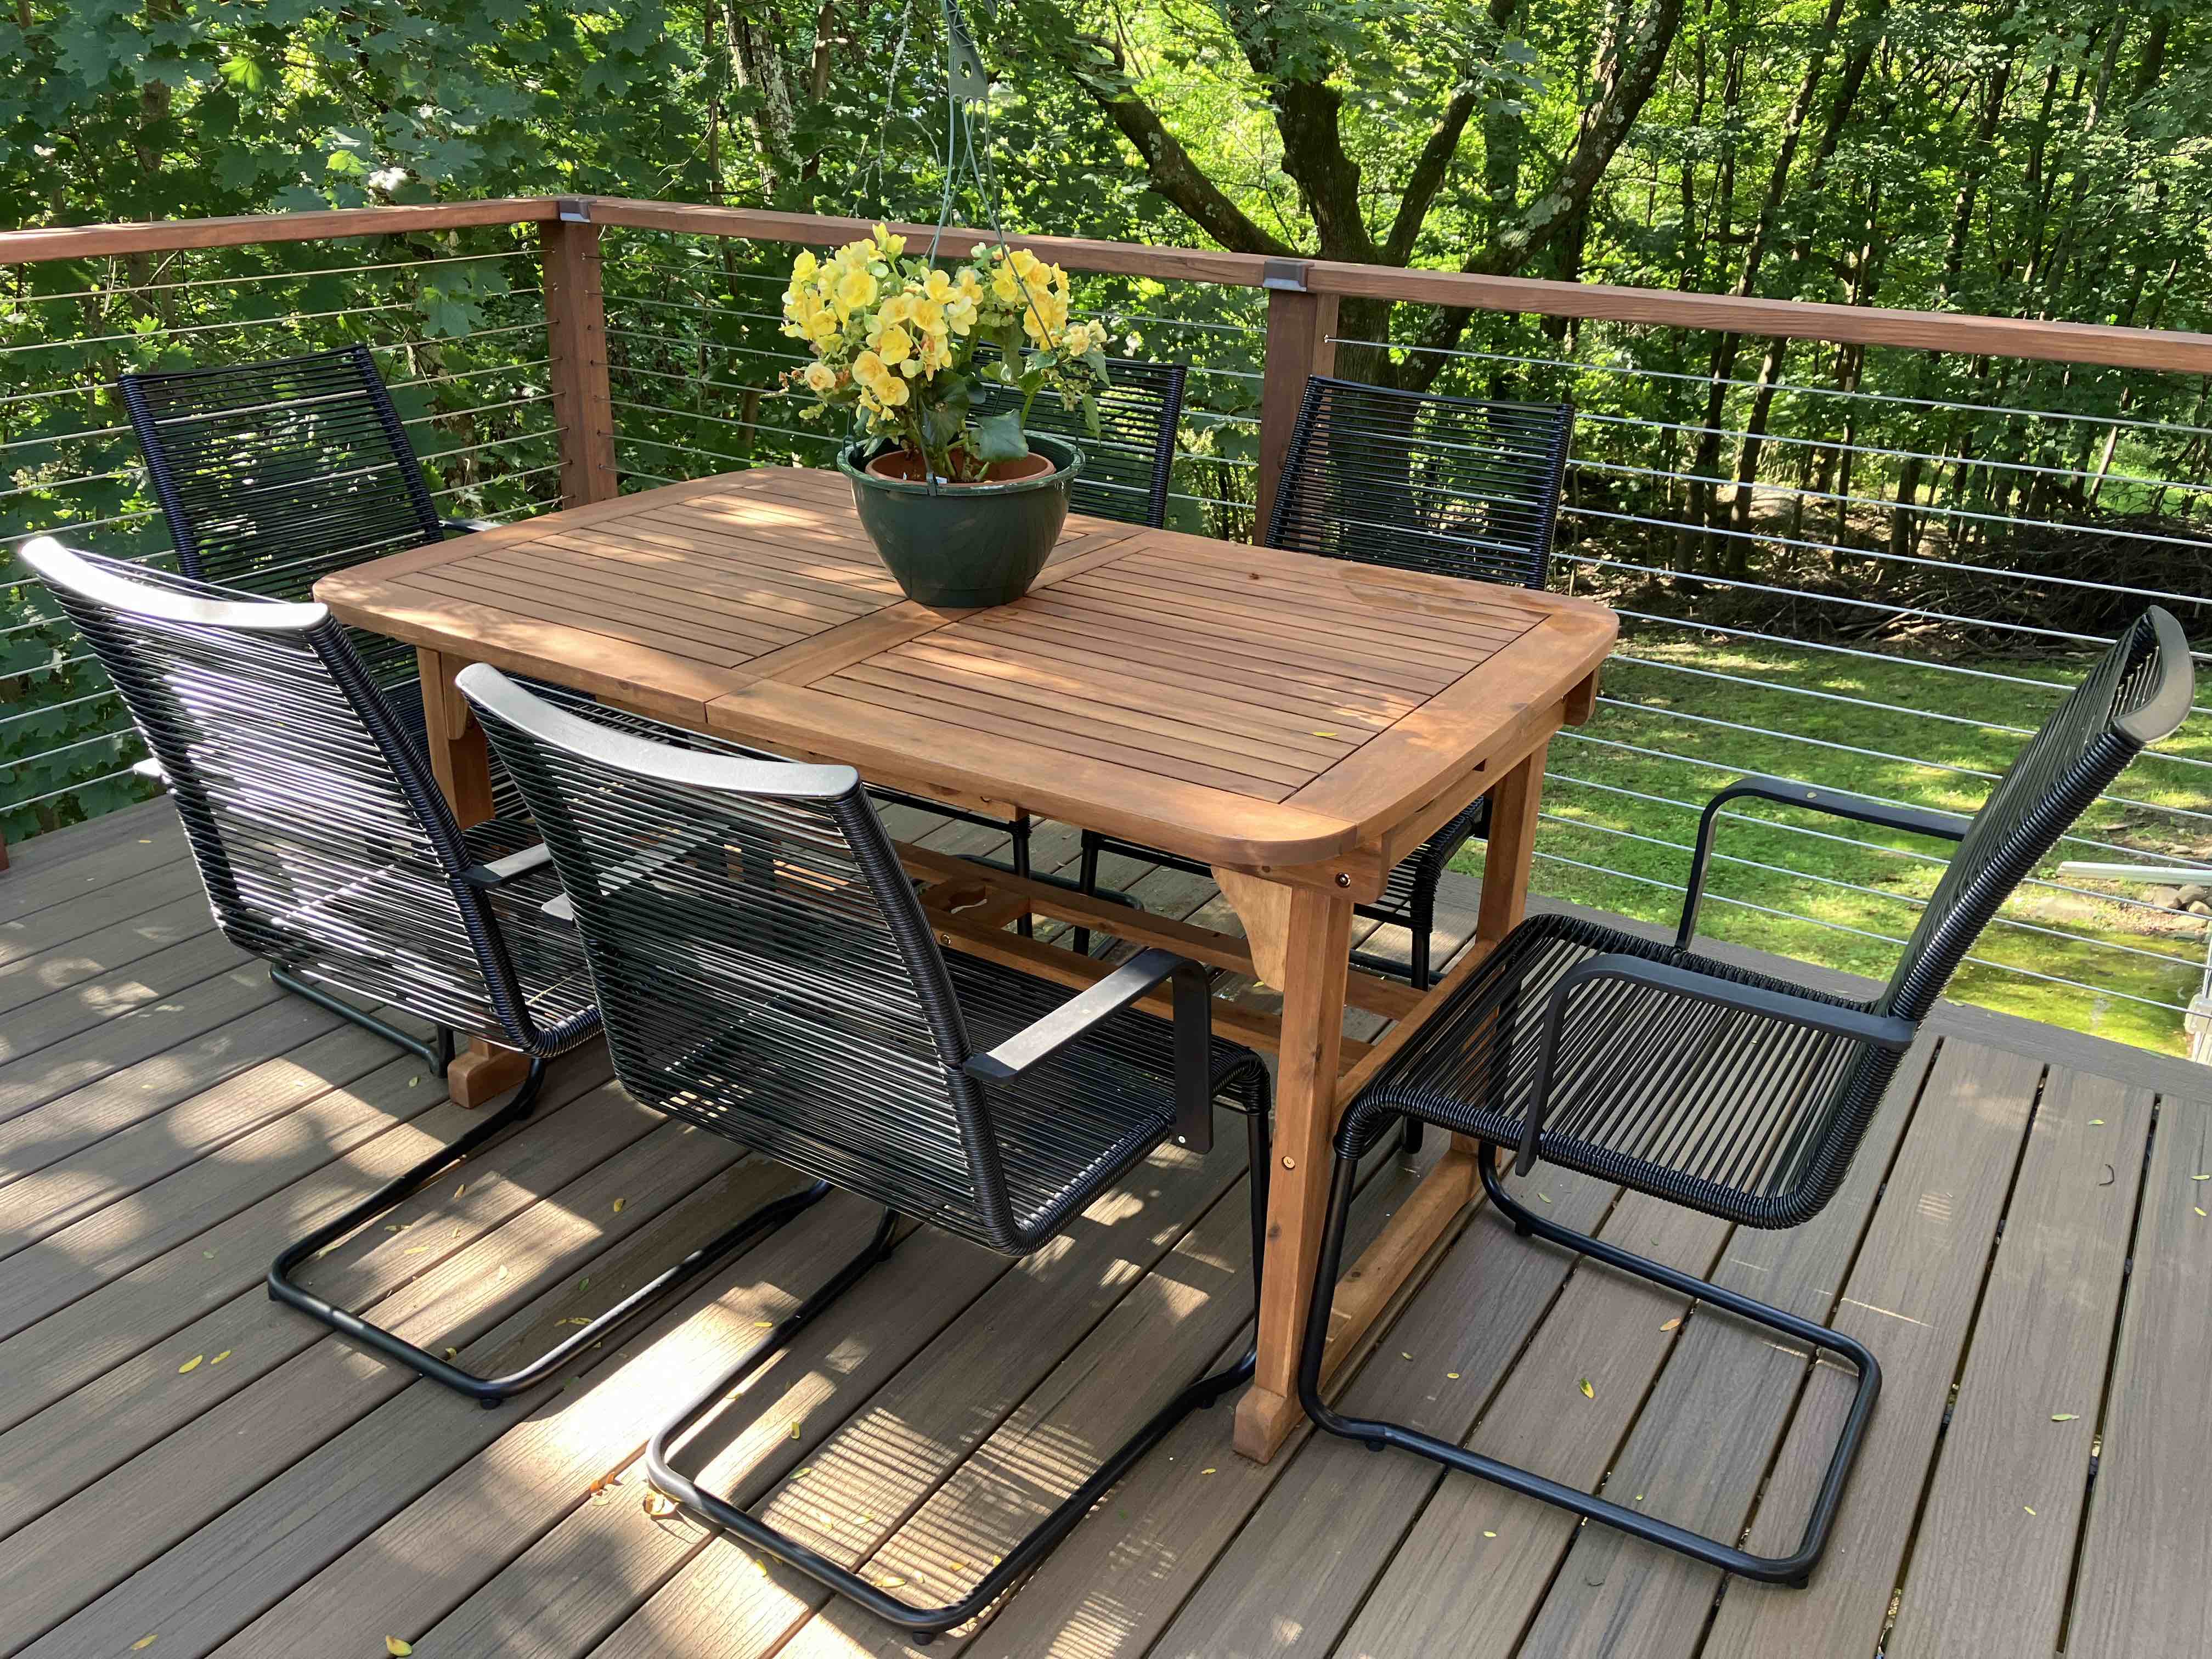
One of the biggest eyesores of our new home is the back deck. Years of rain and snow wore down the deck and it has vertical spokes, which block the view of the creek behind our house. Remodeling our back deck was a no-brainer. Our goal is to remodel our back deck to connect better with nature.
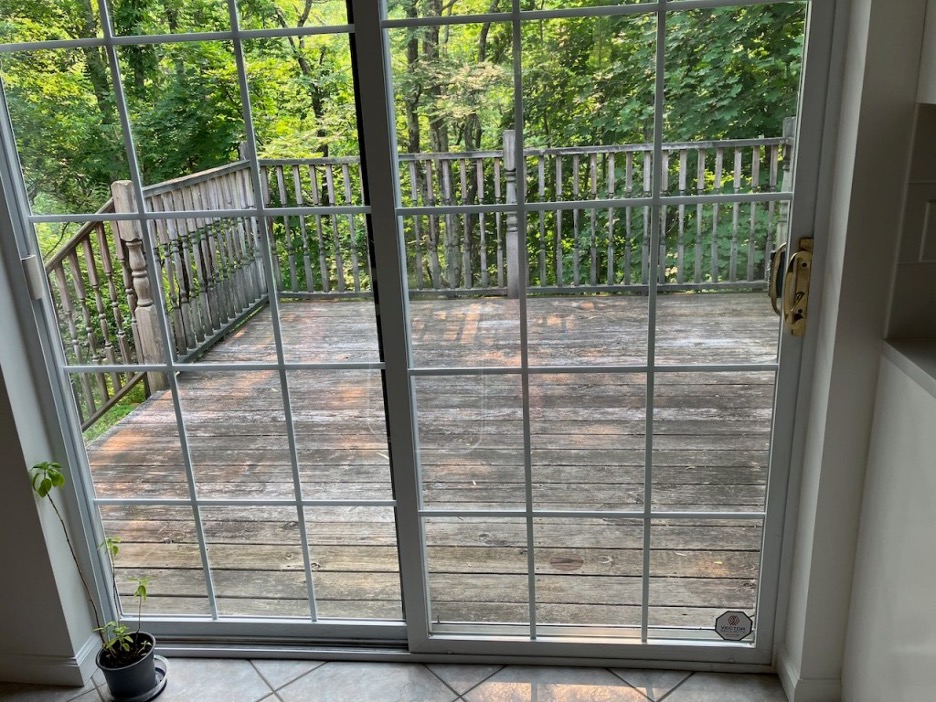
Before Remodel
A cost-effective option is to refinish the deck. While power washing, it was apparent the floor boards and the railings were not salvageable. Thankfully, the frame beneath is in good shape, but refinishing the deck was not going to be possible.

The vision
Our vision to remodel the back deck is to extend the frame two feet parallel with the house, replace the wood decking with Trex and use cable railing so that the creek and the foliage behind the house are more easily accessible.
The demo process
Using one of my favorite power tools, the reciprocating saw, I removed the railings. Then I grabbed my other go-to demo tool, the wrecking bar, and ripped out the deck boards. That left just the frame remaining.
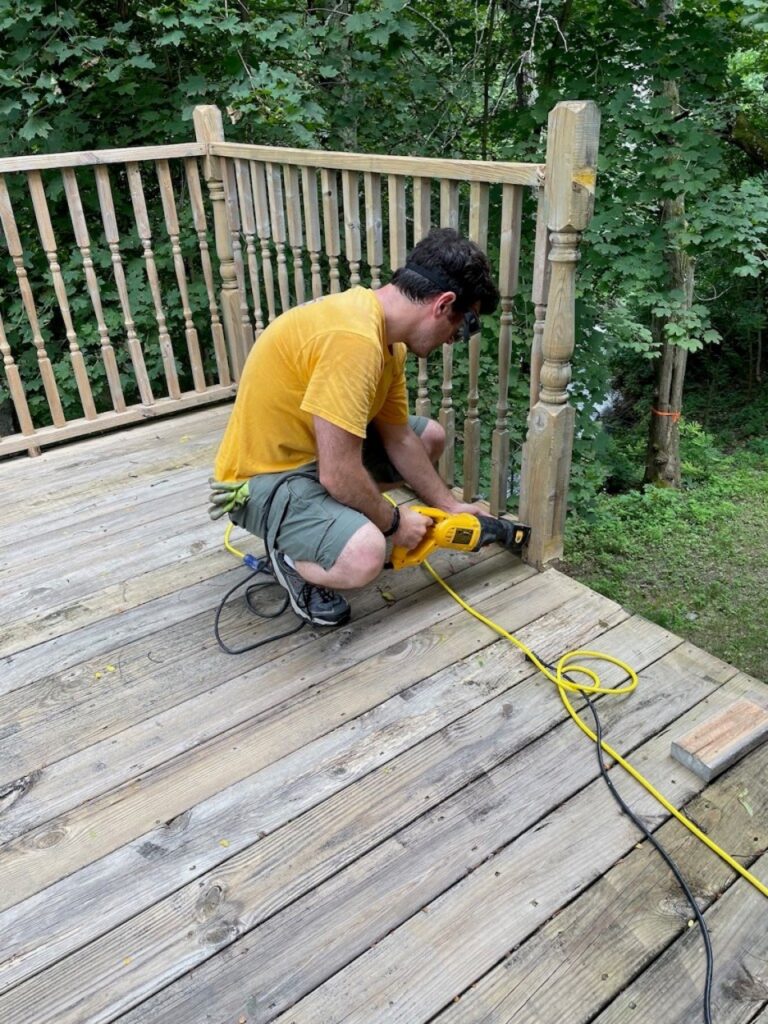
Reframing the deck
To lengthen the deck, I added a extended ledger board and installed a new girder board, securing them on two posts. Three new joists, along with a longer facia, completed the re-frame.
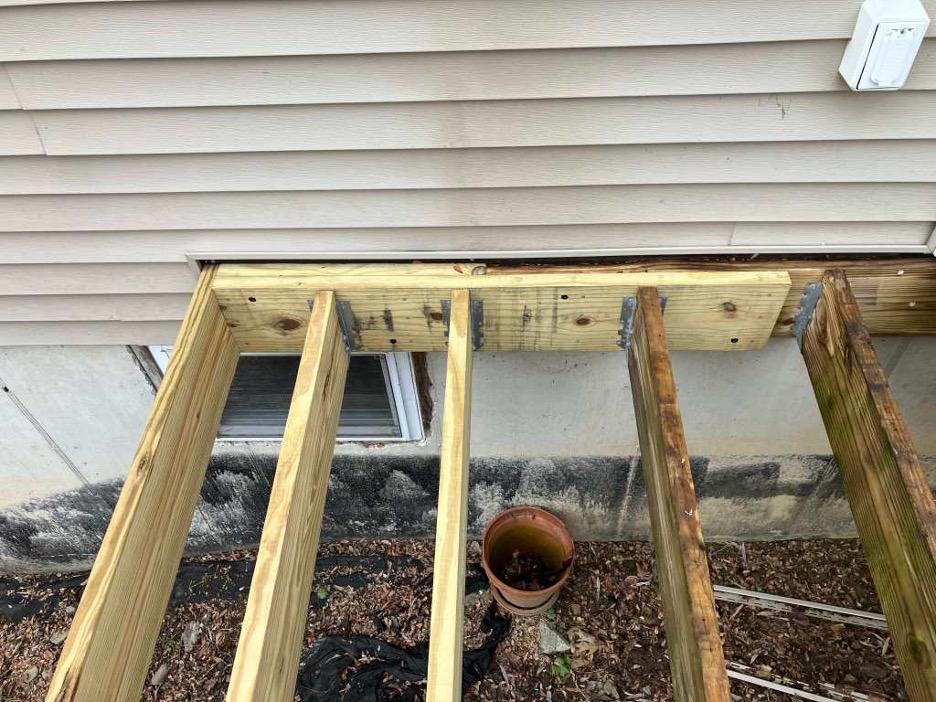

A significant challenge while remodeling our back deck is dealing with a sloped backyard. This meant I couldn’t use a ladder. I needed to be creative with balance while I worked. Below is a photo of me hoisting up the fascia board using a car strap as a pulley.

Having finished the re-framing process, the next phase was installing the Trex boards.
Choosing Trex over a wood deck
Why go with Trex instead of wood boards?
Trex is definitely more expensive, but it’s much easier to maintain and it’s also more durable in the long term. You also don’t need to sand and re-stain or re-paint it every 4/5 years.
Choosing the color of your Trex is challenging and will also impact the overall cost of your deck reno. Lowe’s offers two common colors; Toasted Sand (dark brown) and Clam Shell (gray). There are additional options available, but the cost per board skyrockets. You also can not take those samples home with you. So, we took the common samples home and checked them at various times during the morning, afternoon and evening. We decided the dark brown option was the most compatible with the Beige vinyl siding on the house.
Two Types of Trex
It’s also important to note there are two different types of Trex boards; the square boards, used for framing, and the grooved boards.

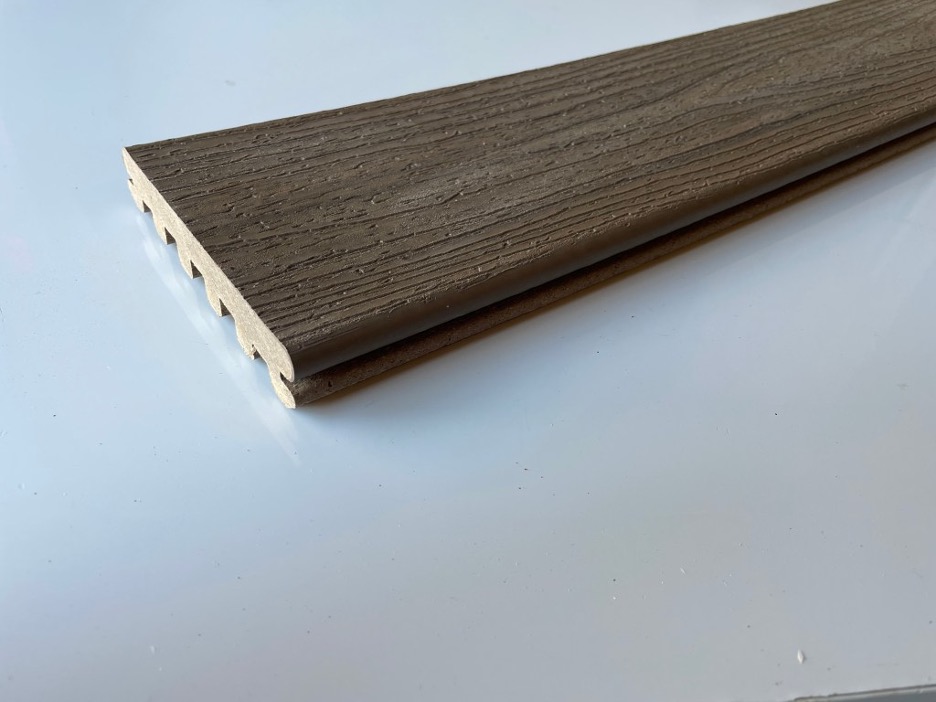
I learned this the hard way, after I had already installed the grooved boards and noticed how hideous they looked lined up along the edge of the deck frame. You need to build additional framing for the square framing boards.
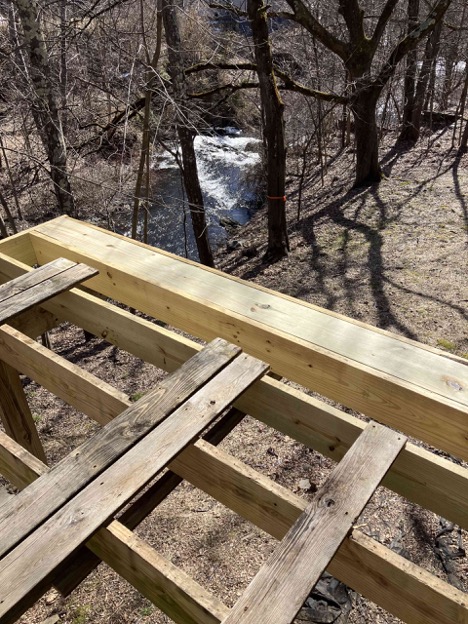
Installing Trex boards
Once the square boards were in place, I worked on reinstalling the grooved boards. Trex are installed using hidden fasteners, which hold each board in place and also provide a gap between the boards. This allows them to expand and contract as the weather changes.
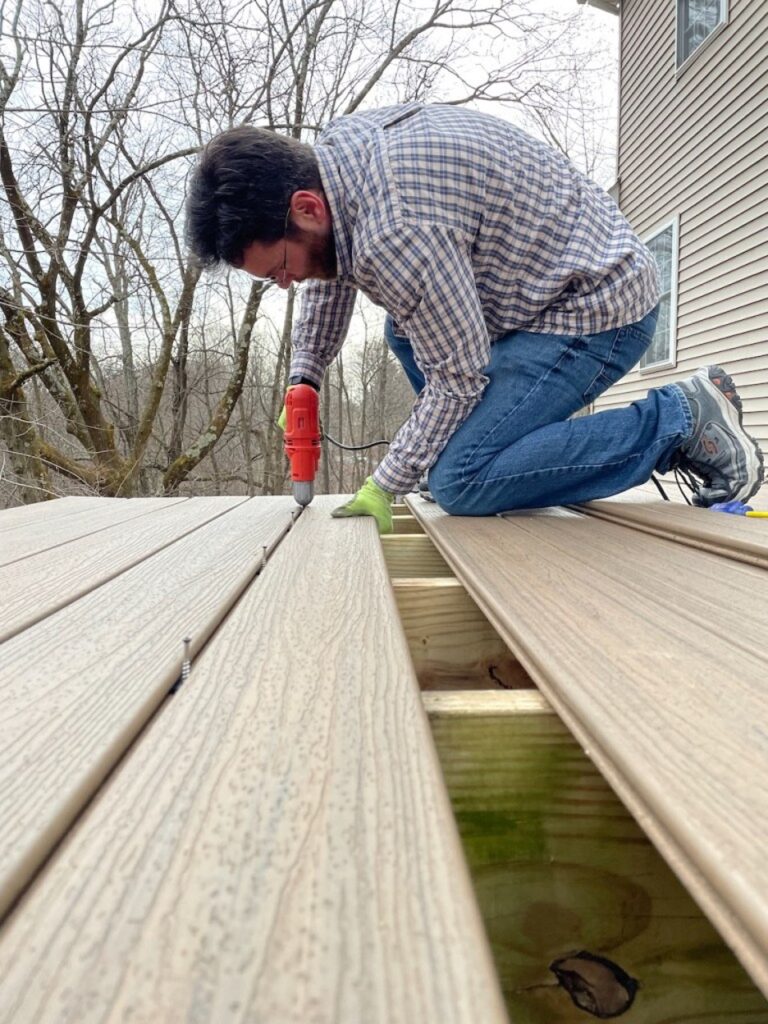
It’s important while you are installing grooved Trex boards to be sure that each board is lined up properly. Otherwise, you may find your boards are off by an inch or more as you get closer to your house’s frame.
New railing posts
With the Trex installed, it was time to add the deck railing posts. I bought 4x4x8′ posts, sawed them in half, and removed half of the ends to secure them to the deck frame. We sampled three different stains and settled on a Dark Oak stain for the posts and railing.

Installing Cable Railing
The last phase was installing the cable railing. The cable itself and corresponding hardware is available in different sizes and are available from multiple companies. We chose 3/16” cable (vs. 1/8”) cable wire, Protector Sleeves, Invisible Receivers and Swage Stud Ends for the deck railing and Toggle Turnbuckles for the stairs.
If all of this sounds technical and confusing, it was! I found you have to be very careful to order the correct corresponding hardware, so read the descriptions carefully!
A Rail System Installation Guide (measures 3 inches between each hole) and a 30 and 90 Degree Drill Guide helps ensure all drill holes line up properly. You’ll also need a strong pair of Wire Cutters and a Crimping Tool to secure the cable to the Hidden Receivers. WEAR SAFETY GOGGLES!
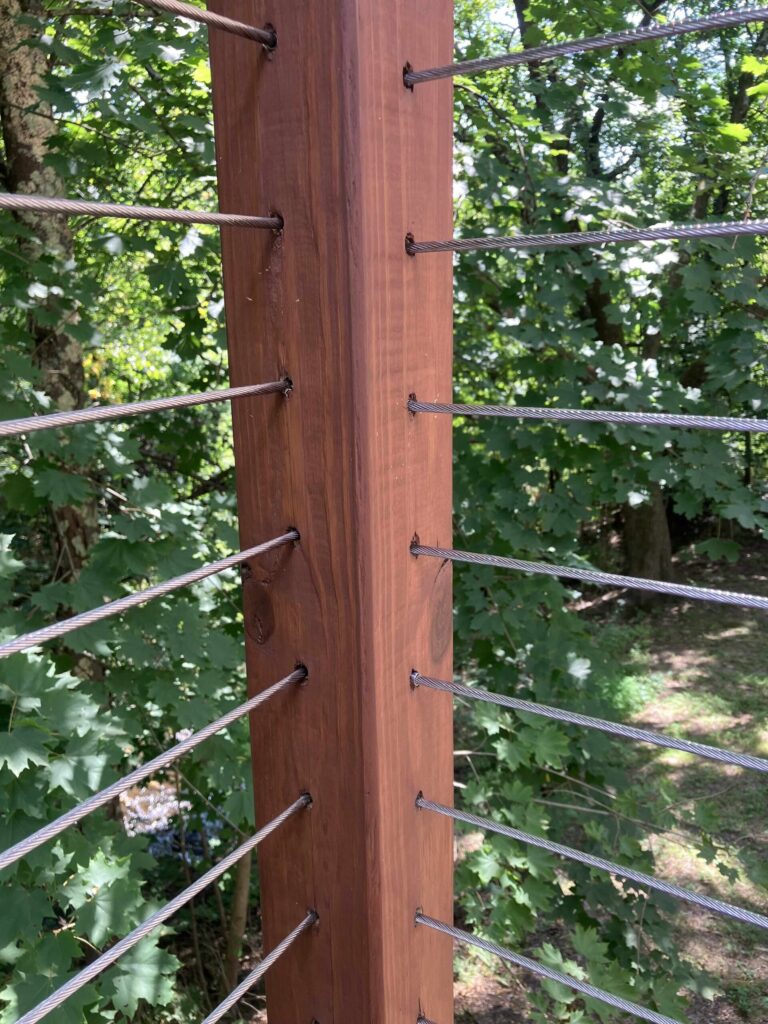

When the building inspector reviewed the work done, we learned there can’t be a more than a 6+ inch gap between the top railing and the top cable run. So, I had to add two additional cables around the entire deck.
Final Thoughts
In the end, it all looks so much better and worth the extra effort! The back deck is everything we envisioned. We can see and enjoy the creek and foliage more easily.
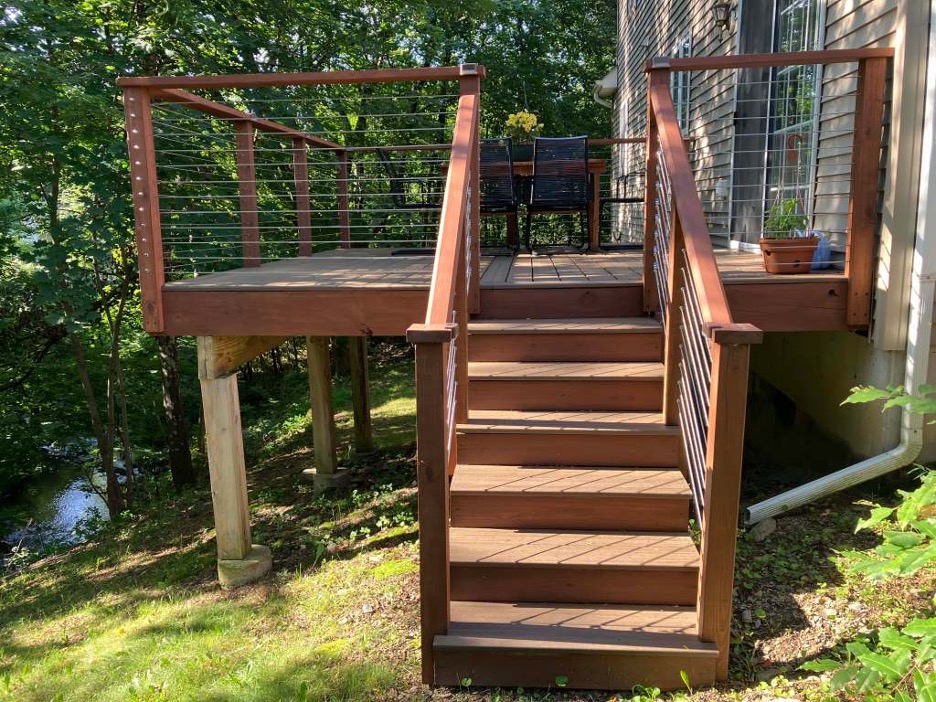
We even found the perfect solar powered railing lamps that illuminate the frame of the deck.

We also found an expandable table that ties in perfectly with the Dark Oak stain we chose for the deck posts and railing.
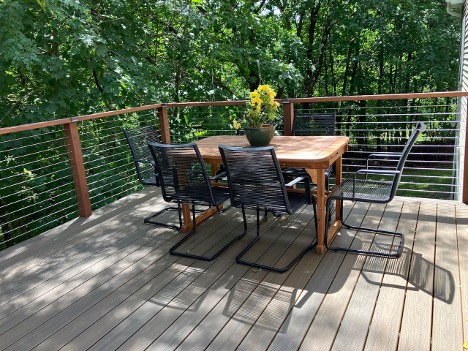
Now we’re enjoying afternoon and evening meals listening to the creek and to birds chirping and watching our resident squirrels do astounding acrobatic feats jumping through the trees off the creek. It’s such a tranquil environment.
Below is a breakdown of materials and costs if you are considering your own deck remodel. If you like this story, check out our kitchen makeover post.
Materials & Cost$:
Deck
Lowes Home Improvement:
– Clamp to keep posts in place Item #1319083 $31.33 /ea.QTY 1 $31.33
– Deck Post Stain Item #45810 $8.53 /ea.QTY 1 $8.53
– Deck Screws Item #894277 $11.38 /ea.QTY 1 $11.38
– Facia Board Item #239853 $14.46 /ea.QTY 1 $14.46
– Girder Board Thread Bolt Item #756075 $2.76 /ea.QTY 5 $13.80
– Girder Board Hex Nut Item #756033 $0.48 /ea. QTY 5 $2.40
Joists
– Joists Item #312276 $21.51 /ea.QTY 2 $43.02
– Hanger Item #108802 $2.23 /ea.QTY 3 $6.69
– Tape (2″x50′ 10 pack) $57.42
– Tape (6″x50′ 2 pack) $68.99
– Ledger Board Nails Item #69216 $6.39 /ea.QTY 1 $6.39
– Ledger Board Screws Item #194827 $13.59 /ea.QTY 1 $13.59
– Nails for Fascia Board Item #69216 $7.58 /ea.QTY 1 $7.58
– Paint Brush Item #253307 $3.78 /ea.QTY 1 $3.78
– 8′ Railing Item #312274 $12.86 /ea.QTY 3 $38.58
– 16′ Railing Item #312277 $27.53 /ea.QTY 1 $27.53
– Railing Posts Item #552328 $9.01 /ea.QTY 1 $9.01
– Stair Railing Item #1218667 $8.45 /ea.QTY 2 $16.90
– Roofing Nails for Vinyl Siding Item #108165 $4.73 /ea.QTY 1 $4.73
– Square Item #118095 $5.21 /ea.QTY 1 $5.21
– Square Item #3636540 $6.63 /ea.QTY 1 $6.63
– Support Tie Item #198476 $11.27 /ea.QTY 2 $22.54
Trex
– Ribbed Trex Item #1217539 $39.49 /ea.QTY 26 $1,026.74
– Square Trex Item #1217537 $19.76 /ea.QTY 12 $237.12
– Hidden Fasteners Item #1438102 $119.20 /ea.QTY 1 $119.20
– Hidden Clips Item #303569 $56.51 /ea.QTY 1 $56.51
– Screw Plugs $26.99
– Vinyl Siding Tool Item #76781 $5.87 /ea.QTY 1 $5.87
– Replacement Vinyl Siding Item #6555 $8.27 /ea.QTY 1 $8.27
Deck Total: $1,899.76
Cable Railing
Amazon:
– Adjustable Angle Tumbuckle $102.59
– Angle Beveled 45 Degree Protector Sleeves $36.99
– 100′ 3/16 Cable $65.46
– 500 Ft. 3/16 Cable $138.51
– Cabling Drill Guide $17.99
– Cable Drill Guide $32.28
– Crimping Tool $65.99
– Deck Stair Angled Bevel Washer $29.99
– Deck lights $42.99
– Invisible Receiver and Swage Stud End $59.99
– Protector Sleeves $47.99
Cable Railing Total: $700.76
Deck Table Set:
Walker Edison
– Deck Table $249.00
Ikea
– Deck Chairs $85
Amazon
– Outdoor Table Cloth $34.99
– Protection Spray $24.98
PROJECT TOTAL: $2,909.49
Recent Posts
The Laundry / Mud / Pantry Room Refresh
For many homes the mud room is the initial entry point from the garage. Our house is no different….

Must Have DIY Landscaping Tools
Do you need to replace any of your landscaping tools? Fall is fast approaching and it marks the second time of…
How To Add Texture And Depth With Wainscoting
Wainscoting is a great way to add texture, depth and character to any room. It also protects your drywall from…
How To Add New Crown Molding For An Elevated Finish
When we first walked through our new home, the only room that had crown molding installed was the living room….
New DIY Home Office Makeover: The Reveal (Pt.4)
I first started our home office makeover in April and it’s time for the reveal! Similar to our experience with our new walk-in…
New DIY Home Office Make Over: Refinishing Heirloom Desks (Pt.3)
As part of our home office remodel, we have two mid-century desks that need refinishing. Both are family heirlooms from my father. Refinishing:…
Leave a Reply