
As part of our home office remodel, we have two mid-century desks that need refinishing. Both are family heirlooms from my father.
In this post:
Refinishing: Starting out
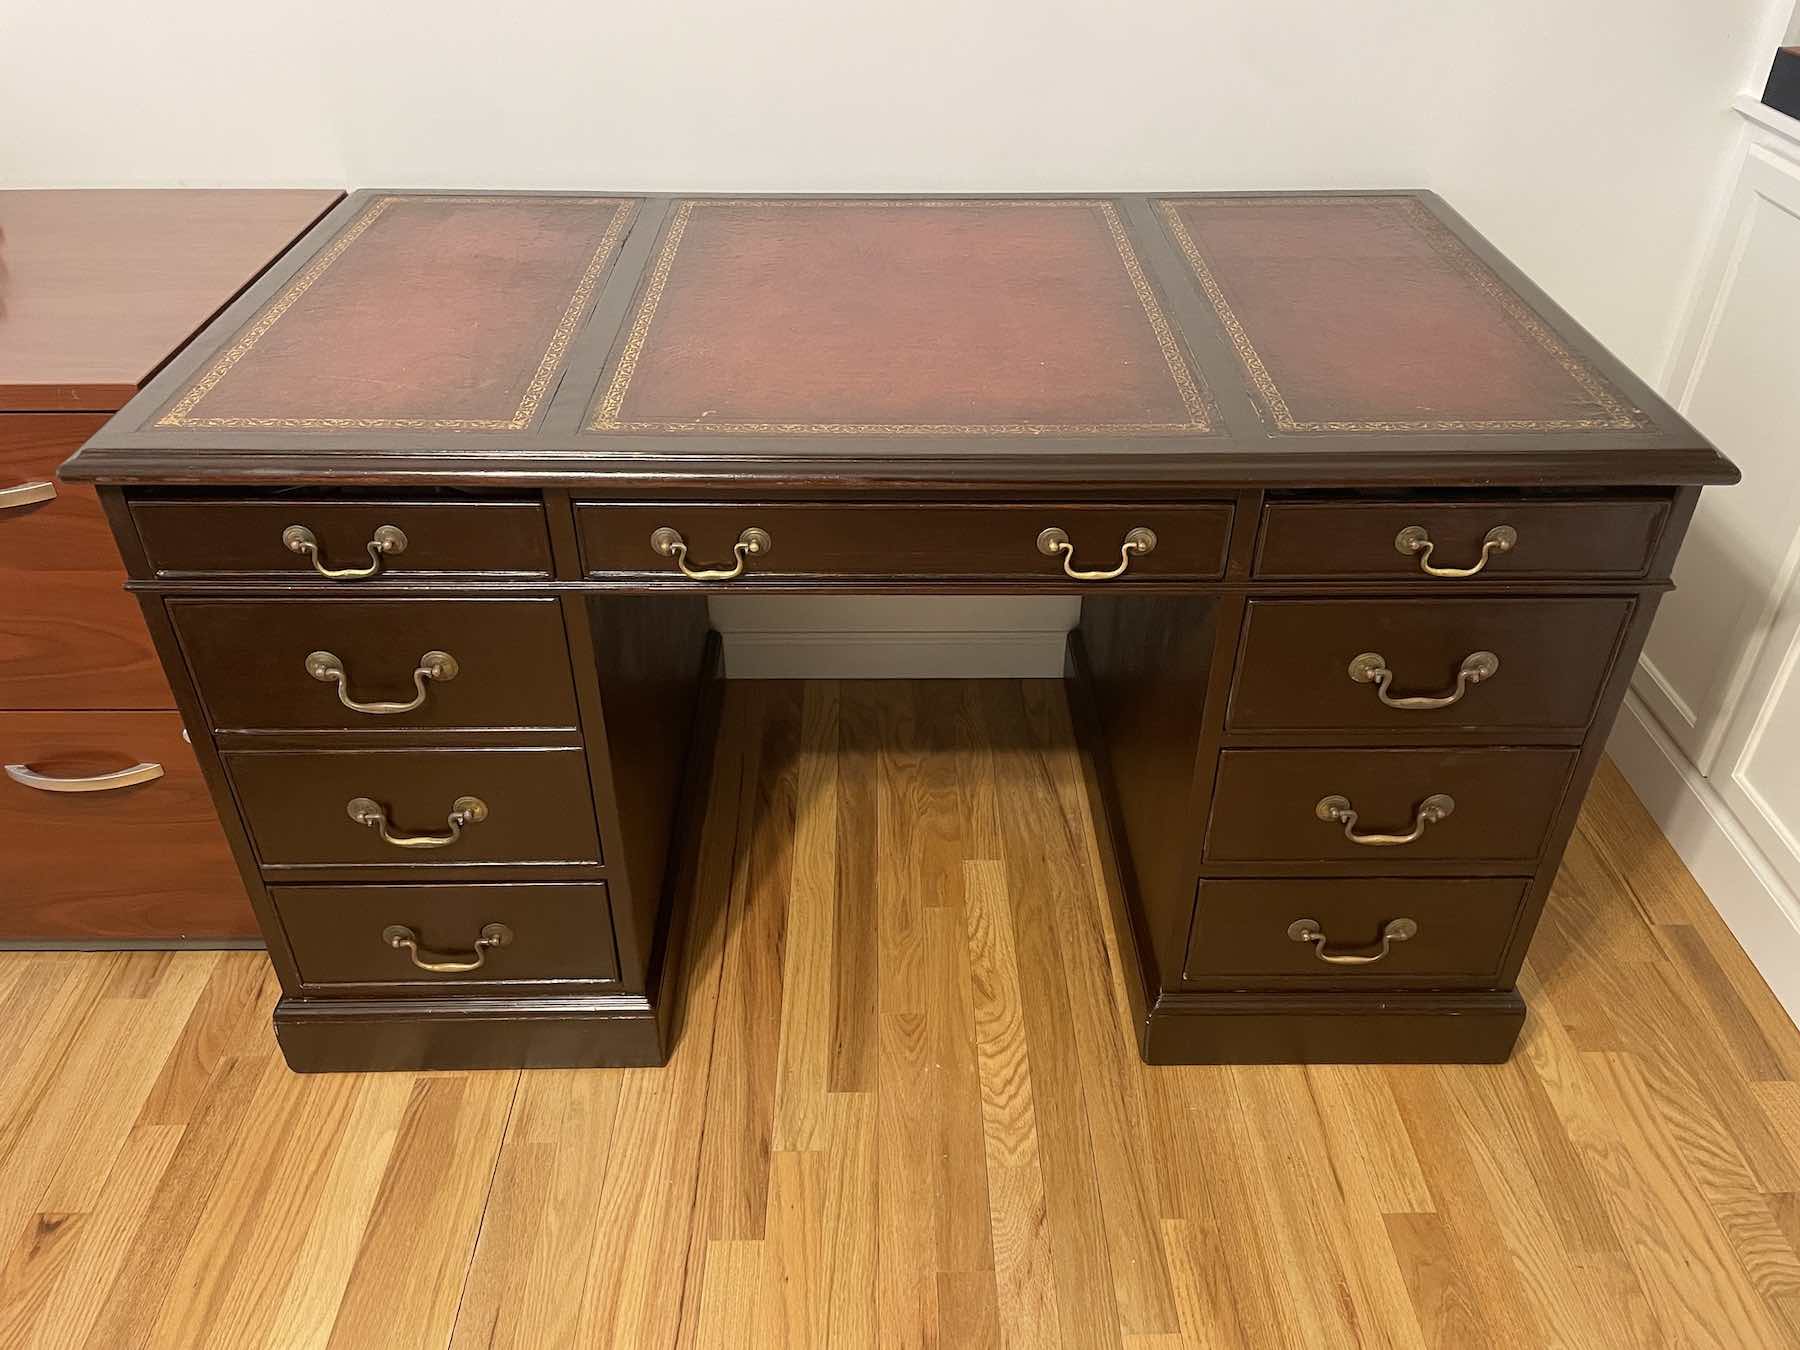
One is the desk my father used as a lawyer. It is bulky, with deep drawers and an expansive 53” top. It even has two pull-out shelves if you need to spread out even further. Lastly, it has 3 leather inlays sections that I want to preserve.


The other was his smaller childhood desk, which is less bulky and has a more typical 42” surface.

Both desks are scratched, faded and generally beaten up from years of use and being moved multiple times.
Repairs Using Woodfiller
The bases of both desks were pretty beaten up at the corners, rear and side seams.


I used wood filler to patch up the damaged areas of each desk, sanding down each area and adding more as needed to rebuild the details.


Stripping the old stain off
Simultaneously, I worked on stripping off the stain on each desk.
There are two ways to strip furniture down to their original wood. One is to use a stripping agent and the other is to use a heavy grit sand paper. I decided to use both methods to see which worked better.
There are two options for stripping agents, and it basically comes down to how toxic or not toxic they are. The toxic options have all sorts of warnings on the back of their cans warning you about the impacts of their contents. Basically, you don’t want to inhale the stuff, get any on your skin and they are highly flammable.
While the toxic options are very effective and easily cut through multiple layers of paints and stains, I remembered using the stuff years ago, outdoors, but without a face mask. Big mistake! Hours later my stomach was in nauseating pain and I also broke out with a nose bleed.
I did not want to repeat that experience. So, this time I went with the less toxic route using Citri Strip. You still don’t want the stuff to get on your skin, etc., but it’s not flammable and even comes with a nice citrusy fragrance.

Klean Strip is another non-toxic brand you can try out. You can find these brands at any of your local hardware stores such as Lowe’s, Home Depot, etc.

This time I wore a face mask and safety glasses and disposable gloves just to be on the safe side.
I first tested the stripper on the side of the legal desk indoors using a disposable paint brush and putty knife and let it sit between 30 – 90 minutes to see if the timing had an impact on efficiency.

No matter how long I let the stripping gel do its work, it took two coats to remove the stain from the desk. It was also a super messy experience cleaning up the sticky and gooey residue that peeled off.


Then I had to let the wood sit for 24 hours to let it dry out before I could sand it. There were areas where it actually looked like the wood was sweating.
Sanding everything smooth
Once I started sanding, using 150 grit sand paper with my DeWalt sander, I quickly realized I could no longer do the work indoors. Dust was getting everywhere, including the new bookshelf I’d just installed. We had to move everything into our garage.

This proved problematic. Spring was just getting started. It was raining a lot and temps fluctuated between 90 degrees one day, and 25 degrees one night, all within a week. It was so bad that virtually all of the local farmers, apple and wine growers in the Hudson Valley reported experiencing substantial loss because the new blossoms died overnight. They lit bonfires and used helicopters overnight to try staving off the worst, but it was just too much of a shock to their harvests.
For me it limited when I could apply new stain. So, I focused on getting all of the old stain removed and sanding the two desks. I continued using 150 grit sandpaper, which I had readily available, but I was going through it quickly.

I ultimately used some 80 grit and that much more effective to get the heaviest stain off, then returned to the 150 grit to smooth the surfaces out.


Applying Gel Stain

During the moments when it was warm enough, I switched to staining, using a Mahogany Gel Stain that I could apply using a staining pad. The staining pad makes it much easier to get into hard to reach areas than a paint brush and applies the stain evenly with a smooth finish. It ultimately took two coats of the gel stain to cover all of the surfaces.

I also added two coats of Fast Drying Polyurethane to the top of the smaller desk.


The drawers for the smaller desk had a musky smell to them, so I rubbed a coat of lemon oil into them to freshen them up and provide protection for them going forward. I’m sure I will need to do this periodically in the future.


Final Thoughts
With the two desks now stained and dried, they look much improved and we can’t wait to start using them. If I’m refinishing any furniture in the future, I will stick to using heavy sandpaper followed by fine grit sandpaper vs. the stain stripper. The latter is better for refinishing surfaces that are already peeling and the surfaces need to be sanded either way.
Just be careful because there can always be lead in the paint/stain and that can easily end up in the air you breath.


Below is a breakdown of materials and costs if you also have furniture that needs refinishing. If you missed my previous post, learn how I built custom bookshelves for our office space.
Materials and Cost$
CitriStrip (1 qt)-$13.98
Disposable Brush-$1.67
Disposable Gloves-$2.98
Disposable Putty Knives-$3.98
Dust Mask-$2.51
Fast Drying Polyurathane-$9.98
Eye Protection-$9.98
80 Grit Sandpaper-$6.88
150 Grit Sandpaper-$12.98
Mahogany Gel Stain (2x)-$24.98 each
Staining Pads (4 pack)-$7.98
Project Total: $121.98


