
In This Post:
It’s been over a year since I demo’d our primary bathroom and closet and we’re thrilled that we have now completed the renovation and moved into our dream walk-in closet. It’s everything we hoped for and more.
During the Summer of 2024 we were staring at a metal rack shelf that also served as the clothing rod. It wasn’t nearly enough space to accommodate all of our clothes. We dreamed of having a spacious closet, with loads of storage space.

The Starting Point

It was apparent we needed to expand the size of the closet. That required tearing out the existing closet wall, building a new wall blocking off the hallway leading to the bathroom, and creating a new doorway into the bathroom. An overhead HVAC duct and a small existing radiator needed to be incorporated into the design layout. No space would be left unused.


Mitchell Contracting, who worked on our kitchen and bathroom remodels, built the additional wall and installed the overhead lighting. That helped give us a better feel of the space available.

Getting Inspiration
We studied many photos of walk-in closet layouts on Google and Houzz for inspiration. Then I found a series of YouTube videos by Stefani Terry (Friedenfels) of Home With Stefani, detailing one of her own closet renos. The videos helped me make sense of what was needed and how the closet could be built DIY. She served as an inspiration for this project, including using pocket screws and Ikea dressers. Below is a photo from her closet reveal, which inspired our own closet build.

The New Design
We needed two levels of clothing rods, matching dressers, a shoe rack, lots of additional shelving and space for laundry. After learning how to use Sketchup (another helpful assist from Stefani), I designed a plan that would maximize the space and shared it with my wife, Joanna.

I also mapped out the space with painter’s tape. That allowed us to visualize how the clothing racks, shelving and dressers would work together. It also showed us how much elbow room we would have. We were tripling our storage space and could both be inside the closet without bumping into each other.

We were ready to build. Not a whole lot changed from the original design.
The build
My first task was removing that metal shelf and spackling all of the holes left behind.

With that done, I worked on building the frame for the clothing rods. I cut out sections of the baseboard so the side paneling fit snugly, using my Oscillating Multi-tool. I wasn’t actually sure if we were going to get our two levels of clothing rods in until those four panels were installed.

While I initially tried securing the side panels to the drywall using 1 ½” screws and wood glue, I quickly discovered that approach was not going to work for this project. So, I got 3” screws instead, used a stud finder, and secured them directly into the studs. I also used a pocket drill guide and pocket screws (my first time using these) to secure the panels into the floor. This was a much more effective approach for me and set the process for the rest of the closet build.

Once each of the four panels were in place, I set about adding the top shelf. While the floor was level throughout the room, this is when I discovered just how uneven the walls of the closet were, a continual issue throughout the build.

After multiple cuts and trims, I got the top shelf in and secured it with more pocket screws. I measured out the locations for each of the clothing rods, and to my relief, raising the top rod a couple of inches provided just enough clearance for the bottom rods.


Ikea dressers
While most of the building supplies I used came from Lowe’s, our go-to resource for our renovation projects, we got two matching TARVA 5-drawer dressers from Ikea. Aside from the clothing rods and the small radiator, the dressers dictated the spacing for the rest of the closet build. It took about 2 hours to build each dresser and they matched perfectly with the wood paneling/shelving I got from Lowe’s.
Taking a cue from other DIYers, I skipped installing the legs beneath the dressers and instead built a base of 2×4’s that I secured to wall studs and added a flat panel for the dressers to lay on. The dressers were then secured to side panels that would double as sides for the shelving.


The build continued
From there, I set about installing the final wall panels and fitting each of the remaining top selves, securing everything with the pocket screws. The variances of the walls grew clearer, with some gaps behind the panels as wide as ¾ of an inch or more.


With the panels in place, I began installing the shelves. This in one area where my Sketchup design and reality didn’t match, so I had to make some adjustments along the way.


The last shelving to go in was for the shoe rack. Everything ultimately looked like it was the way the closet should have been built in the first place.

Filling in the gaps: wood filler, filler rods and caulking
With all of the paneling in place, the next step was filling in the pocket screw holes and the gaps at the tops of the panels, caused by the uneven walls. I used wood filler to cover the pocket screw holes, using multiple coatings to fill the gaps evenly.

Many of the gaps behind the panels were too large to simply caulk over, so I got some filler rods: 3/8”, 1/2” and 5/8” to fill in the gaps. Even then some of the gaps were too large, so I had to get creative. I retrieved the long wood strip that once held up the shelf in the old closet and got two additional 1×2 wood strips, then cut and trimmed them down, using a table saw and an oscillating multi-tool, so they would fit behind the shelving. Thank goodness this plan worked.


With the wood strips and filler rods in place, I set about caulking behind each shelving space and the clothing rod panels. It took way more caulk than expected, 10 tubes in total! Similar to the wood filler, it took multiple layers of caulk to make everything smooth.


Sanding
Once all of gaps were filled, the closet required a whole lot of sanding. I knew that the sanding was going to create a ton of dust, so I covered the doorway leading to the bathroom with a plastic sheet to contain the dust. Then I grabbed my DeWalt sander, a box of 150-grit sand paper, and got to work.

The 150-grit sandpaper did the trick, even in the roughest areas. Did I mention there was going to be a lot of dust? The plastic sheet definitely helped contain it. I swept, vacuumed and wiped down everything with wet towels, making sure no dust remained.
Priming
I used 1-2-3 Bulls-Eye Water Based Primer to prime the surfaces. It took multiple coats to cover the knots in the wood, using a little over a gallon of primer to complete 2 coats.

One thing to note here: there is both water-based and oil-based interior/exterior primer. While oil-based primer may cover a surface area more effectively and for longer than a water-based primer, it is petroleum based, so it smells intensely and requires lots of ventilation. I tried it… and quickly stopped using it. It made our house smell like an oil field. If you are going to use an oil-based primer or paint, I recommend only using them for exterior projects. Oil-based primer is also more expensive than water-based primer.
I did another light sanding of the primer layer with 180 grit sandpaper to smooth out the surfaces and create a better bonding surface for the paint.

Painting
We considered several different color options to paint the closet. Our shower tile has varying shades of blue in it, making it difficult to match, and the floor tile is a mixture of grey and brown, which was also difficult to match.

We ultimately went with the same bright white paint we’ve used for most of our house, Valspar Signature Ultra White in an Eggshell finish. With the stainless-steel handles we planned to add to the dressers, it proved the best option and tied in perfectly with our bathroom. I used a gallon of paint for this project.
The finishing touches


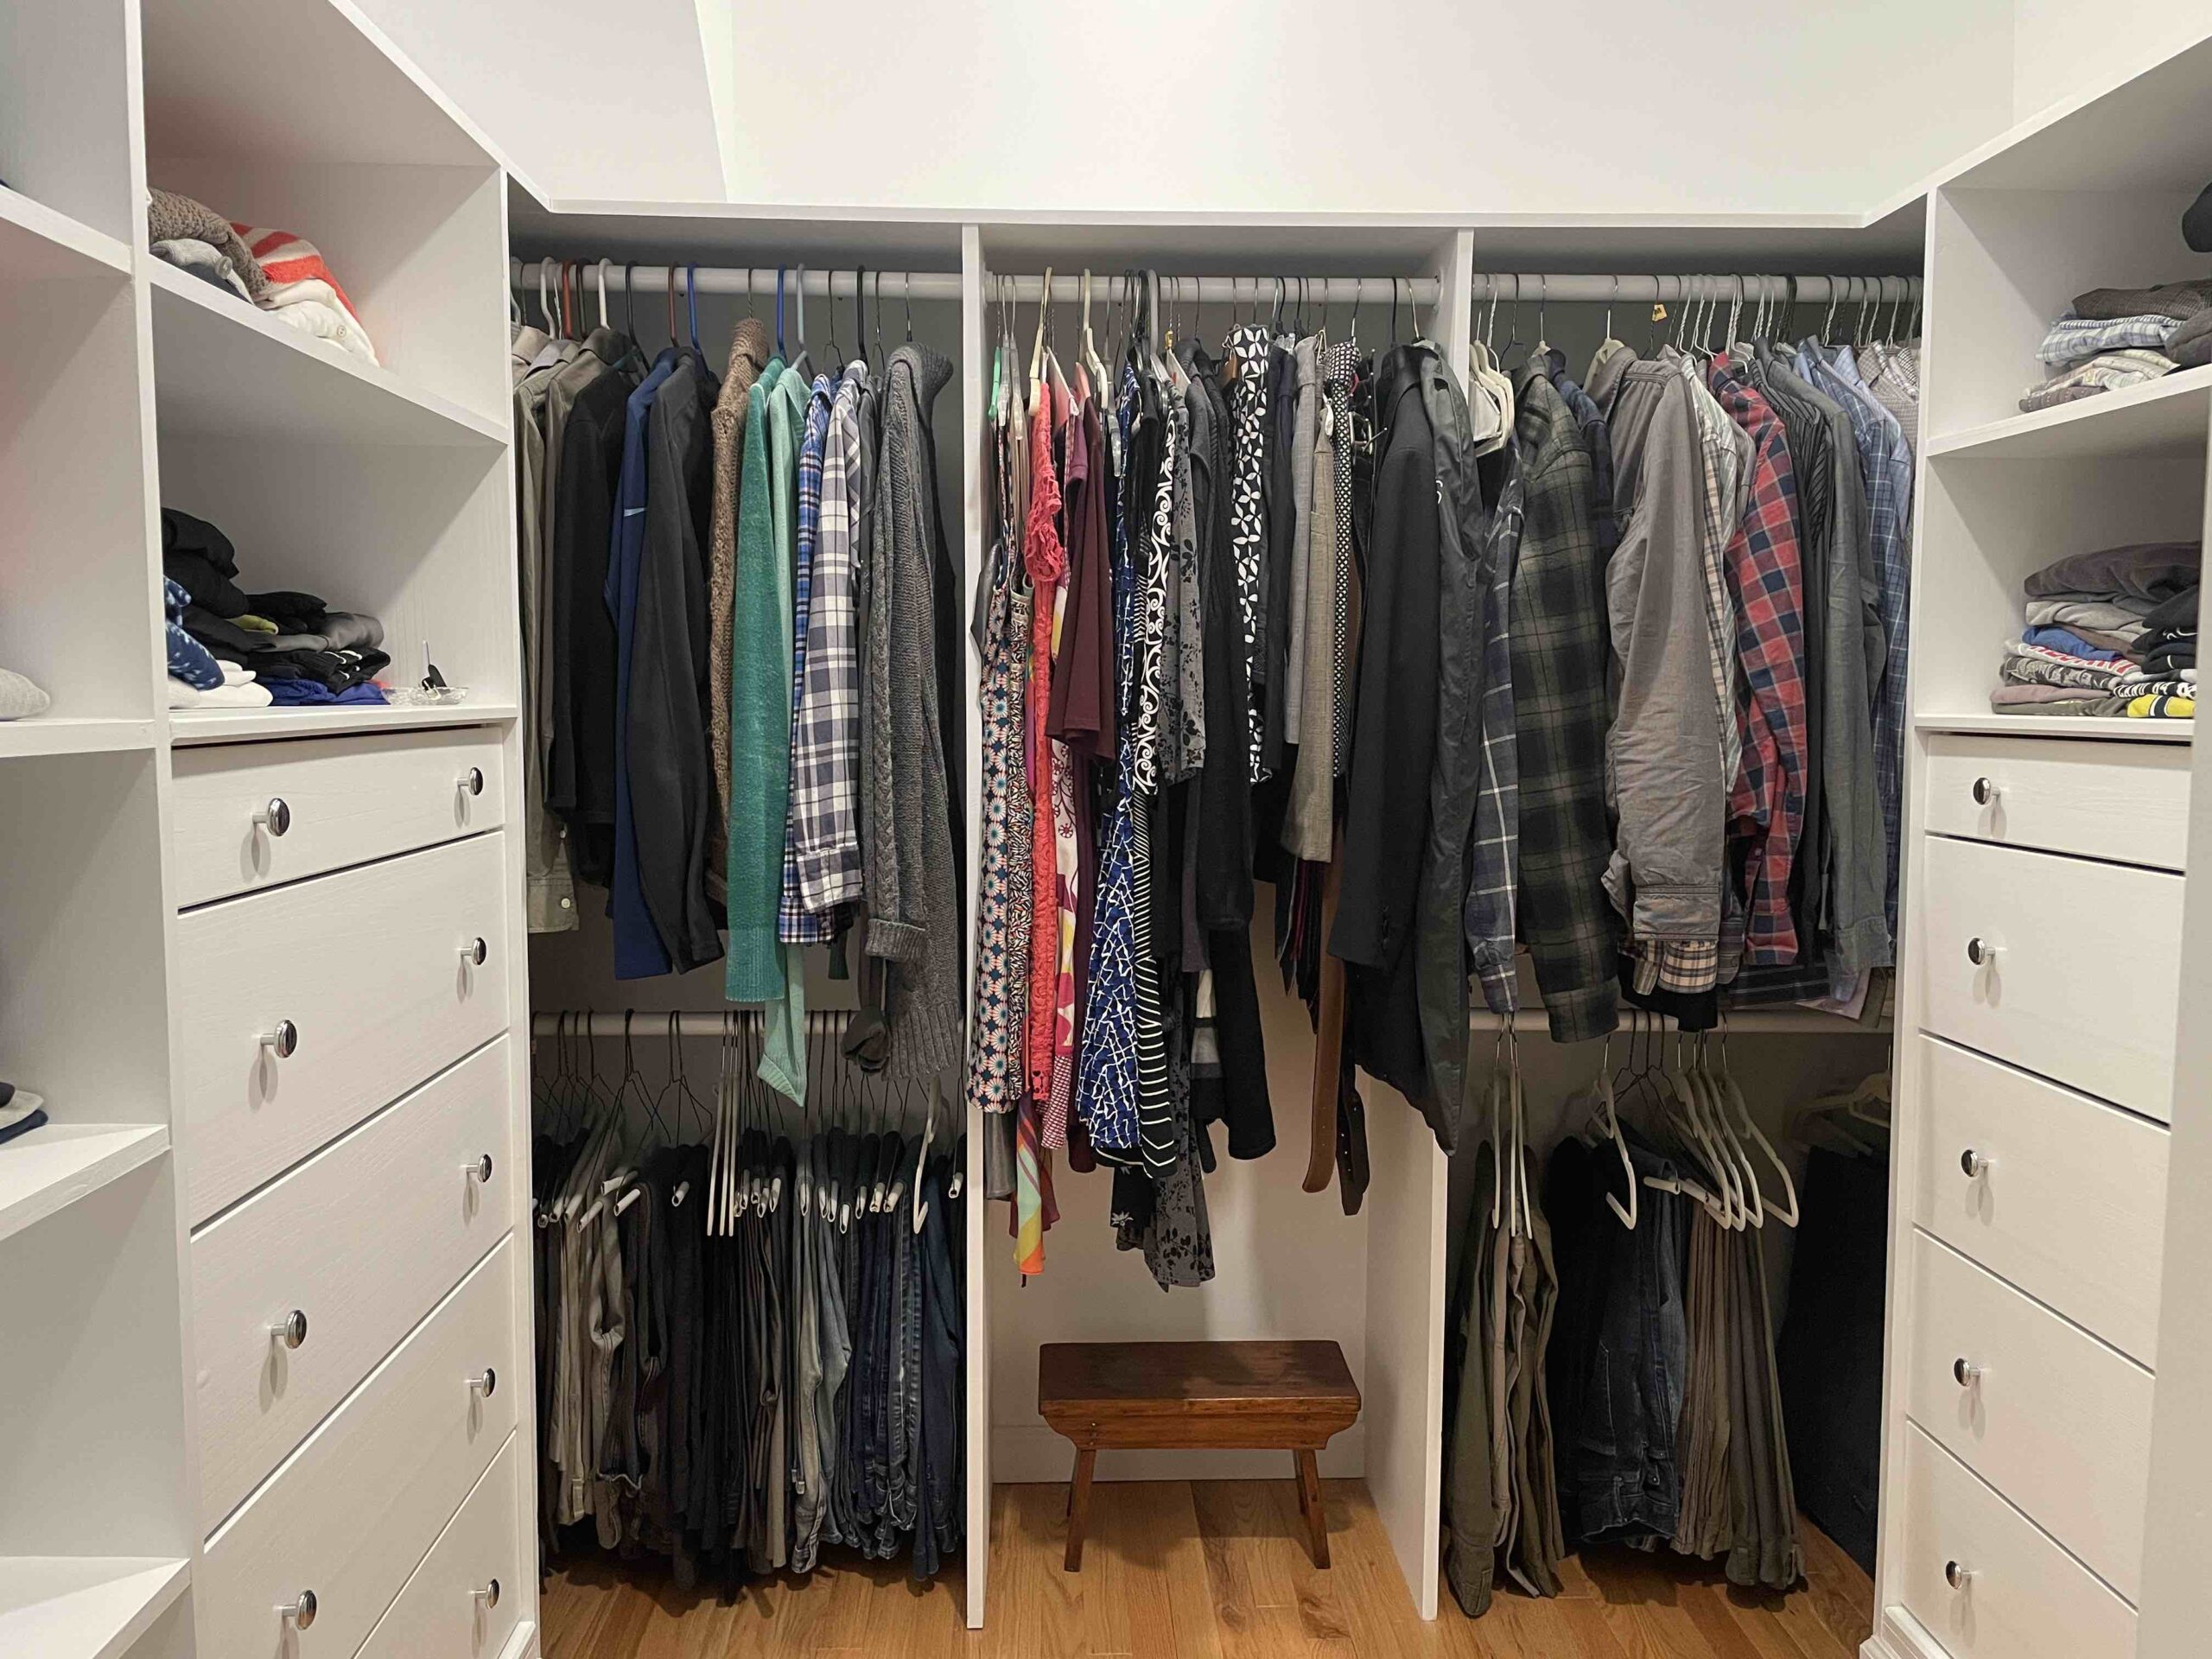
The final tasks were putting the clothing rods back into place and adding the handles to the dressers. Looking around the room, it was hard to believe how much the space had transformed, and we couldn’t wait to move our clothes in!
It was a labor intensive, but joyful experience transferring our clothes into the new closet. We couldn’t believe how much space we had to work with or how much stuff we had to fill in the shelves and drawers. The tiny NYC apartment we once shared had two decent sized closets, which kept us sane while living there, but this is the best closet we’ve ever had since we started living together.
With the primary bathroom and closet renovations complete, we can stop dreaming and finally function normally and comfortably.
Below is a breakdown of materials and costs if you are thinking of remodeling your own closet. If you enjoyed this story, you might also enjoy reading about our kitchen or deck remodels.
Materials & Cost$
Ikea
TARVA 5-drawer dressers-$249.99 each (2x)-$500.00
Lowe’s Materials
Project Source Lumber:
- (3/4x16x6) $29.58 each (13x for panels and shelves)-$384.54
- (3/4x12x6) 24.14 each (2x for shoe rack)-$48.28
- (3/4x16x8)-$32.35 each (top shelf)-$32.35
Project Source Clothing Rods-$17.98 each (2x)-$34.16
Clothing Rod Socket Set-$3.98 each (5x)-$8.98
#10 x 3″ Screws-$12.98 each
Kreg Pocket Screws-$9.95 each (2x)-19.90
Allen & Roth Prospero Dresser Knobs 340548-$1.98 each (20x)-$39.60
Filler Rod:
Wood Shims-$1.58 each
RELIABILT Soft Wood Boards (filler shims)-$2.75 each (2x)-$5.50
Primer-$33.88 (2x)-$67.76
Valspar Signature Ultra White Paint (Eggshell)-$42.73
Spackle-$13.98
Wood Filler-$15.23
Alex Plus Caulk-$3.98 each (10x)-$39.80
Contractor paper– $11.38
Paint Brushes:
- 2″ Edging brush-$13.48
- 2″ flat brush-$3.78
- Mini Rollers-$5.58 each (3x)-$16.74
Project total: $1,330.65
Lowe’s Tools
48″ Craftsman Level-$21.98
Laser Level Pro-$11.99
Square-$7.98
Dewalt Miter Saw-$299.00
Dewalt Sander-$89
Kreg Pocket Drill Jig-$149.00
Circular Saw-$99
Face Mask-$7.98
Safety Glasses-$9.95
Ace Hardware
Porter Cable Oscillating Multi-tool-$129.00
Wallmart
Black & Decker 6 amp Power Drill-$52.20
Table Saw (borrowed from neighbor)


